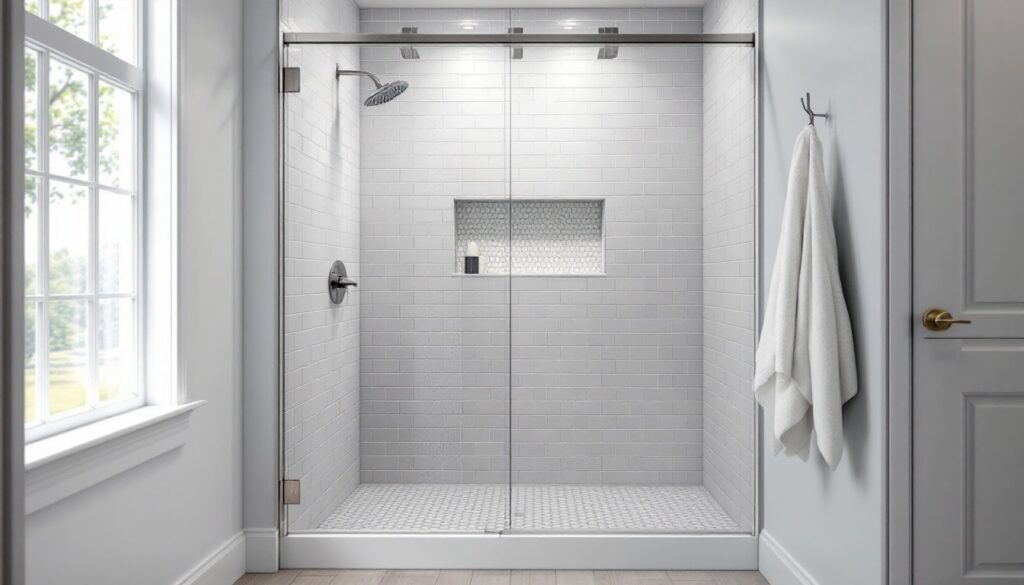
Corner walk-in showers make smart use of awkward bathroom layouts while delivering a modern, spa-like feel. They’re especially effective in small to mid-sized bathrooms where a full enclosure or tub would cramp the space. Whether someone’s planning a full renovation or a targeted upgrade, corner showers offer flexibility in design, material choices, and budget. This guide covers enclosure styles, tile strategies, fixture layouts, storage options, and practical tips for DIYers looking to maximize both function and style without unnecessary complexity.
Table of Contents
ToggleWhy Choose a Corner Walk-In Shower for Your Bathroom
Corner walk-in showers fit naturally into the 90-degree junction of two walls, making them ideal for bathrooms with limited floor area or irregular footprints. They free up the center of the room and often allow for better traffic flow than a standard alcove shower or tub combo.
In terms of dimensions, most corner showers range from 36″ x 36″ up to 48″ x 48″ or larger, depending on available space. Smaller units (under 40″) feel tight for most adults, especially if multiple showerheads or built-in benches are involved. For comfortable daily use, aim for at least 42″ x 42″ interior clearance.
From a structural standpoint, corner installations typically involve one or two existing walls and may require new framing or moisture-resistant backer board (like cement board or foam underlayment) on open sides. If the project involves moving plumbing or modifying load-bearing walls, consult a licensed plumber or contractor. Many jurisdictions require permits for work that touches supply lines, drains, or structural framing, check local building codes before cutting into walls.
Corner showers also lend themselves to barrier-free or low-threshold designs, which improve accessibility and simplify cleaning. A properly sloped shower pan (minimum 1/4″ per foot toward the drain) and a linear drain along one edge can eliminate the need for a raised curb entirely, though this may require lowering the subfloor or using a mortar bed to achieve the correct pitch.
Glass Enclosure Styles That Maximize Light and Space
Glass enclosures define the footprint of a corner shower without blocking sightlines or natural light. The most common configurations are neo-angle, curved, and frameless corner panels.
Neo-angle enclosures feature a three-panel design with two fixed panels against the walls and an angled door at the corner. This geometry opens into the room at a 45-degree angle, reducing the visual bulk of a square enclosure. Standard neo-angle kits fit 36″ to 42″ corner spaces and use 3/16″ to 1/4″ tempered glass. The angled door requires pivot or hinge hardware rated for wet environments, stainless steel or brass resist corrosion better than plated zinc.
Curved enclosures replace the angled front with a gentle arc, softening the profile and adding a few inches of elbow room inside. These are factory-formed and typically arrive as complete kits. Installation is straightforward, but curved glass can’t be field-cut, so exact measurements are critical before ordering.
Frameless corner panels offer the cleanest look: two fixed glass sheets secured with minimal hardware. This style demands precise layout, panels must align with wall studs or blocking for solid anchor points, and the finished walls need to be plumb and square. Frameless glass is usually 3/8″ to 1/2″ thick for structural stability and is held by U-channels or clamps at the base and top. It’s heavier and more expensive than framed alternatives, but the absence of metal tracks reduces mold buildup and simplifies cleaning.
For light transmission and privacy, clear glass keeps small bathrooms feeling open, while frosted or textured glass (rain, seeded, or fluted patterns) obscures the interior without sacrificing brightness. If privacy is a priority but the room lacks a window, consider a half-frosted panel on the door only.
Tile Patterns and Materials for Stunning Corner Showers
Tile selection sets the tone and durability of a corner shower. Start with a water-resistant substrate, 1/2″ cement board or a waterproof membrane system like Schluter Kerdi or RedGard over standard drywall.
Porcelain and ceramic tile remain the most cost-effective and versatile choices. Porcelain is denser and less porous, making it better suited for floors and high-moisture walls. Standard field tiles range from 4″ x 4″ mosaics up to 12″ x 24″ subway or plank formats. Large-format tiles (anything over 12″ x 12″) reduce grout lines, which means less maintenance and fewer places for mildew to grow.
For the floor, use tile with a coefficient of friction (COF) of 0.60 or higher to prevent slips. Smaller mosaics (1″ hex, penny rounds, or 2″ x 2″ squares) provide more grout joints, which improve traction naturally. Sheet-mounted mosaics speed up installation, they come on mesh backing in 12″ x 12″ sections.
Natural stone like marble, travertine, or slate adds texture and color variation. Stone requires sealing before grouting and periodic resealing (every 6 to 12 months for heavy-use showers). Marble is softer and more prone to etching from acidic cleaners, so it’s better suited for wall accents than floors.
Pattern-wise, vertical stacking elongates walls and draws the eye up, while herringbone or chevron adds movement without overwhelming a small space. For a design often featured in modern bathroom remodels, consider a feature wall behind the showerhead using a contrasting color or texture, subway tile in a stacked bond on three walls with a vertical marble accent stripe creates a focal point without busy repetition.
Grout color matters more than most DIYers expect. Light grout shows stains quickly: dark grout hides dirt but can make a space feel closed in. Mid-tone grays and taupes split the difference. Use epoxy grout for shower floors and the first foot of wall, it resists moisture and staining better than standard cement-based grout, though it’s harder to work with and has a shorter open time.
Showerhead and Fixture Configurations for Corner Installations
Corner showers lend themselves to multi-head setups and layered water delivery, but plumbing access and water pressure dictate what’s realistic.
Wall-mounted showerheads are the default. A standard shower arm extends 6″ to 10″ from the finished wall: adjustable-height slide bars let users position the head anywhere along a vertical rail. For corner layouts, mount the primary head on the wall opposite the door (usually the back corner) so users aren’t standing in the spray while adjusting temperature.
Rain heads and ceiling-mounted fixtures create a drenching effect and work well in taller ceilings (9 feet or more). These require overhead plumbing, which may mean running new supply lines through the ceiling or attic. If the shower is on an upper floor, check joist direction and accessibility before committing to a ceiling mount.
Handheld sprayers add versatility for rinsing walls, washing kids, or cleaning the enclosure. Combo units that include both a fixed head and a handheld on the same valve body are widely available and don’t require separate rough-in plumbing.
Body sprays and side jets turn a basic shower into a spa experience but demand careful planning. Each jet requires its own supply line and a valve with sufficient flow capacity. A typical residential water system delivers 6 to 8 gallons per minute (GPM) at the showerhead: adding three or four body sprays can exceed that easily. A thermostatic mixing valve maintains consistent temperature across multiple outlets and prevents scalding if someone flushes a toilet mid-shower. This is especially important in older homes with galvanized supply lines or low-flow well systems.
For corner configurations, position body sprays at mid-torso and shoulder height on the side walls, angled slightly toward the center. Avoid placing them directly in line with the door, overspray hits the floor outside the enclosure.
Finish choices (chrome, brushed nickel, matte black, oil-rubbed bronze) should match other bathroom hardware for visual continuity. That said, not all finishes hold up equally well in wet environments. Chrome is durable and easy to clean: matte black shows water spots quickly unless treated with a hydrophobic coating: oil-rubbed bronze can wear unevenly and may need periodic resealing.
Built-In Storage Solutions and Niche Designs
Built-in niches and shelves eliminate the need for hanging caddies and keep soap, shampoo, and razors within reach. Plan these during framing or backer board installation, retrofitting after tile is up involves cutting into finished surfaces.
Recessed niches fit between wall studs (which are typically spaced 16″ on center) and provide 14.5″ of usable width (accounting for stud thickness). Standard niche dimensions are 12″ to 14″ wide, 20″ to 24″ tall, and 3.5″ deep (the depth of a 2×4 stud bay). For deeper storage, fur out the wall with 2×6 framing, giving 5.5″ of depth.
Install niches at a comfortable height: 48″ to 54″ from the shower floor for most adults. If multiple niches are stacked vertically, space them 12″ to 18″ apart. Line the interior with the same tile as the walls, or use a contrasting mosaic or slab material. Slope the bottom shelf slightly toward the front (1/8″ to 1/4″ pitch) so water doesn’t pool inside.
Prefabricated niche inserts made of waterproof foam, stainless steel, or solid surface materials simplify installation and eliminate the need to tile inside the recess. Brands like Schluter (Kerdi-Board-SN) and Noble (Niche-It) offer pre-sloped, ready-to-tile units that mount directly to studs or cement board.
Corner shelves take advantage of dead space where two walls meet. Floating triangular shelves made of solid surface, stone, or tile-over-foam fit snugly into the 90-degree angle and don’t require recessing. Use stainless steel brackets or adhesive mounts rated for wet environments: standard drywall anchors will fail under the weight of wet bottles.
Bench seating adds comfort and storage. A built-in bench typically measures 15″ to 18″ deep and 17″ to 18″ high, similar to a dining chair. Frame it with 2x4s, cover with cement board, apply waterproof membrane, and tile to match. For a floating bench, cantilever the framing off a load-bearing wall and secure it with blocking between studs. Benches need proper drainage underneath: leave a 1/4″ gap between the seat and the back wall to prevent water from pooling.
Budget-Friendly DIY Corner Shower Upgrade Tips
Full shower remodels cost thousands, but targeted upgrades can refresh a tired corner shower without tearing out tile or replumbing.
Re-grout and re-caulk first. Old grout that’s cracked or discolored undermines even high-end tile. Remove the top 1/8″ to 1/4″ of old grout with a grout saw (a manual tool with a carbide blade) or an oscillating multi-tool with a grout-removal attachment. Clean out dust with a shop vac, then apply fresh grout using a rubber float. For caulk, scrape out the old bead with a utility knife or caulk removal tool, clean the joint with rubbing alcohol, and lay a new bead of 100% silicone caulk rated for wet areas. Smooth with a wet finger or caulk tool within five minutes of application.
Replace the showerhead and trim. A new handheld combo unit or rain head can cost $40 to $150 and installs in minutes, just unscrew the old shower arm and thread on the new one. Use Teflon tape (plumber’s tape) on the threads to prevent leaks: wrap it clockwise (viewing from the end of the pipe) three to five times. If the existing arm is corroded or the finish doesn’t match, replace it too. Most arms are standard 1/2″ NPT and require only an adjustable wrench.
Add a glass treatment to reduce soap scum buildup. Products like Rain-X or Aquapel create a hydrophobic coating that causes water to bead and roll off. Apply to clean, dry glass every few months. For frosted or textured glass, these treatments are less effective.
Paint or refinish tile as a last resort. Epoxy-based tile paints (such as Rust-Oleum Tub & Tile or Behr Premium Plus) can cover outdated colors or minor surface damage. Surface prep is critical: clean with TSP (trisodium phosphate), rinse thoroughly, sand lightly with 220-grit paper to help adhesion, and prime if recommended by the product label. Painted tile won’t last as long as new tile, but it can buy a few years before a full renovation.
Upgrade lighting. A well-lit shower feels larger and more inviting. Recessed LED fixtures rated for wet locations (ASTM E283 or IP65 or higher) install in the ceiling directly over the shower. These require cutting into drywall and running electrical wire, so if the project involves adding new circuits or working inside walls, hire a licensed electrician or pull a permit as required by the National Electrical Code (NEC). For quick updates, platforms like Houzz offer inspiration galleries with contractor contact lists for when a project exceeds DIY scope.
Install a linear drain. Swapping a center drain for a linear (trench) drain modernizes the look and improves water flow. Linear drains mount along one edge of the shower floor and work well with large-format tiles because they eliminate the need for a sloped mortar bed in multiple directions. This swap requires cutting into the subfloor and adjusting plumbing, so it’s best done during a larger remodel rather than as a standalone upgrade.
Conclusion
Corner walk-in showers offer flexibility, style, and efficient use of space when planned carefully. From glass enclosures and tile patterns to fixture layouts and storage, each decision affects both function and long-term maintenance. DIYers can tackle many upgrades independently, but structural changes, plumbing relocations, and electrical work often require professional help or permits. For more bathroom design ideas and project planning resources, Homify provides galleries and guides across a range of styles and budgets.